The schedule editor makes it easy to create schedules for school or college that can either be printed or saved as an image file.
Subjects
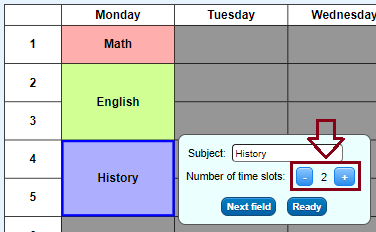
To enter a subject in a field, just click on the field and enter the subject in the input field. Fields with the same subject are automatically assigned the same background color.
For double lessons, simply increase the number of time slots by 1.
Room numbers:
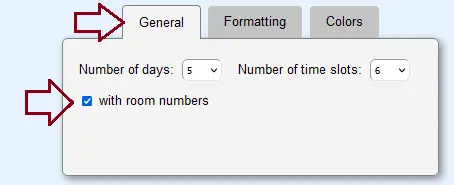
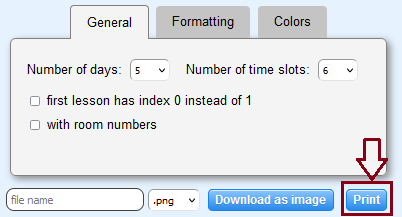
You can choose whether the fields in the timetable should be with or without room numbers. If the timetable should also contain the room numbers, then the checkbox "with room numbers" must be checked in the properties box below the schedule on the "General" tab.
Colors
Same subjects are automatically assigned the same color. In addition, free periods between subjects are colored differently than the fields before the first or after the last lesson. All colors can be adjusted in the properties box under "Colors". Furthermore, colors can also be assigned to the header and the leftmost column.
Days
In the properties box, under "General", you can select how many days the timetable should contain. In case the first day should not be a Monday or the days should be specified in another language, the days can be edited by clicking on the field with the day and entering the new day in the input field.
Left column
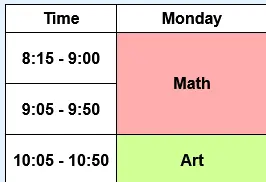
You can choose whether the left column should contain the indices of the time slots (i.e. 1, 2, 3,...) or the times. To do this, click on the field at the top left and select either "Indexes" or "Time". In case the field should be labeled differently, you can enter in the text field what should be written in the field instead. In the properties box, under "General", you can select how many time slots the schedule should contain.
Indexes:
If "Indices" is selected, the fields in the left column will contain the indices of the lessons. In some schools it may happen that before the lesson, which is normally considered as the first lesson, there should be another lesson in the schedule on some days. For this case it can be useful if the left column starts with 0 instead of 1. To achieve this, the checkbox "first lesson has index 0 instead of 1" must be set in the properties box under "General".
Time:
If "Time" is selected, you can enter for each time slot at which time the slot starts and ends.
Formatting
Unlike what you are used to in spreadsheet programs, such as Excel, you cannot change the height or width of a single row in this schedule builder, except for the first column and the header row. Instead, the height and width of all fields can be changed simultaneously. This can be achieved in the properties box under "Formatting". In addition, the font sizes can be specified for the fields for the subjects, the header and the left column. When the font sizes are changed, this also has an effect on the dimensions of the fields. If the text of one field is too long for the field, the font size is automatically reduced for this single field..
Print schedule
The schedule can be printed either with the "Print" button under the properties box or with the key combination [Ctrl]+[P].
In the print preview, lines from the grid are often not displayed. In the printout, however, these are usually present again.
The width and height of the schedule is usually limited in the printout to the height and width of the page (minus side clearances). However, it may happen that the schedule does not occupy the entire page. If it should do so, you can achieve this by increasing the heights, widths and font sizes in the properties box under "Formatting".
Save schedule as image file
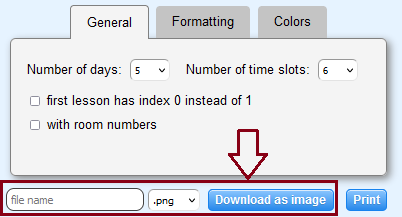
The created schedule can be saved as an image file. To do this, simply enter the desired file name in the text field under the properties box, select the desired file format and then press the "Download as image" button. The image will then be saved in the download folder.
Load schedule
If schedules created on this page are saved as SVG file, they can be reloaded with the button "Load from SVG file". For this to succeed, the SVG file must not have been modified.
